The BlueJay Build - Part 2
The Thrifty Rocketeer blog continues with part 2 of the BlueJay Build...
Next step is the basswood saw tooth hook assembly, but we start with the fuselage. Note that this piece has the blunt end on it and fits nicely long the spine of the glider. You can't select the wrong half, because Jay has configured them like a jigsaw puzzle. Only one fits the correct way. As I apply glue to the joint, it occurs to me that I will have to place this under a book also...and so I select an unused corner of the Acts of Vengeance Omnibus. This upsets my mast supporting the nosecone, but fortunately, it has dried enough that it doesn't stick when it topples over. All is replaced and we await it to dry. Note that the basswood fuselage is in fact thicker than the balsa wood wing, and so, the book doesn't lay quite as flat as before. (Also note, the basswood has a slight yellow tinge to it, while the balsa wood does not. This is of no importance.)


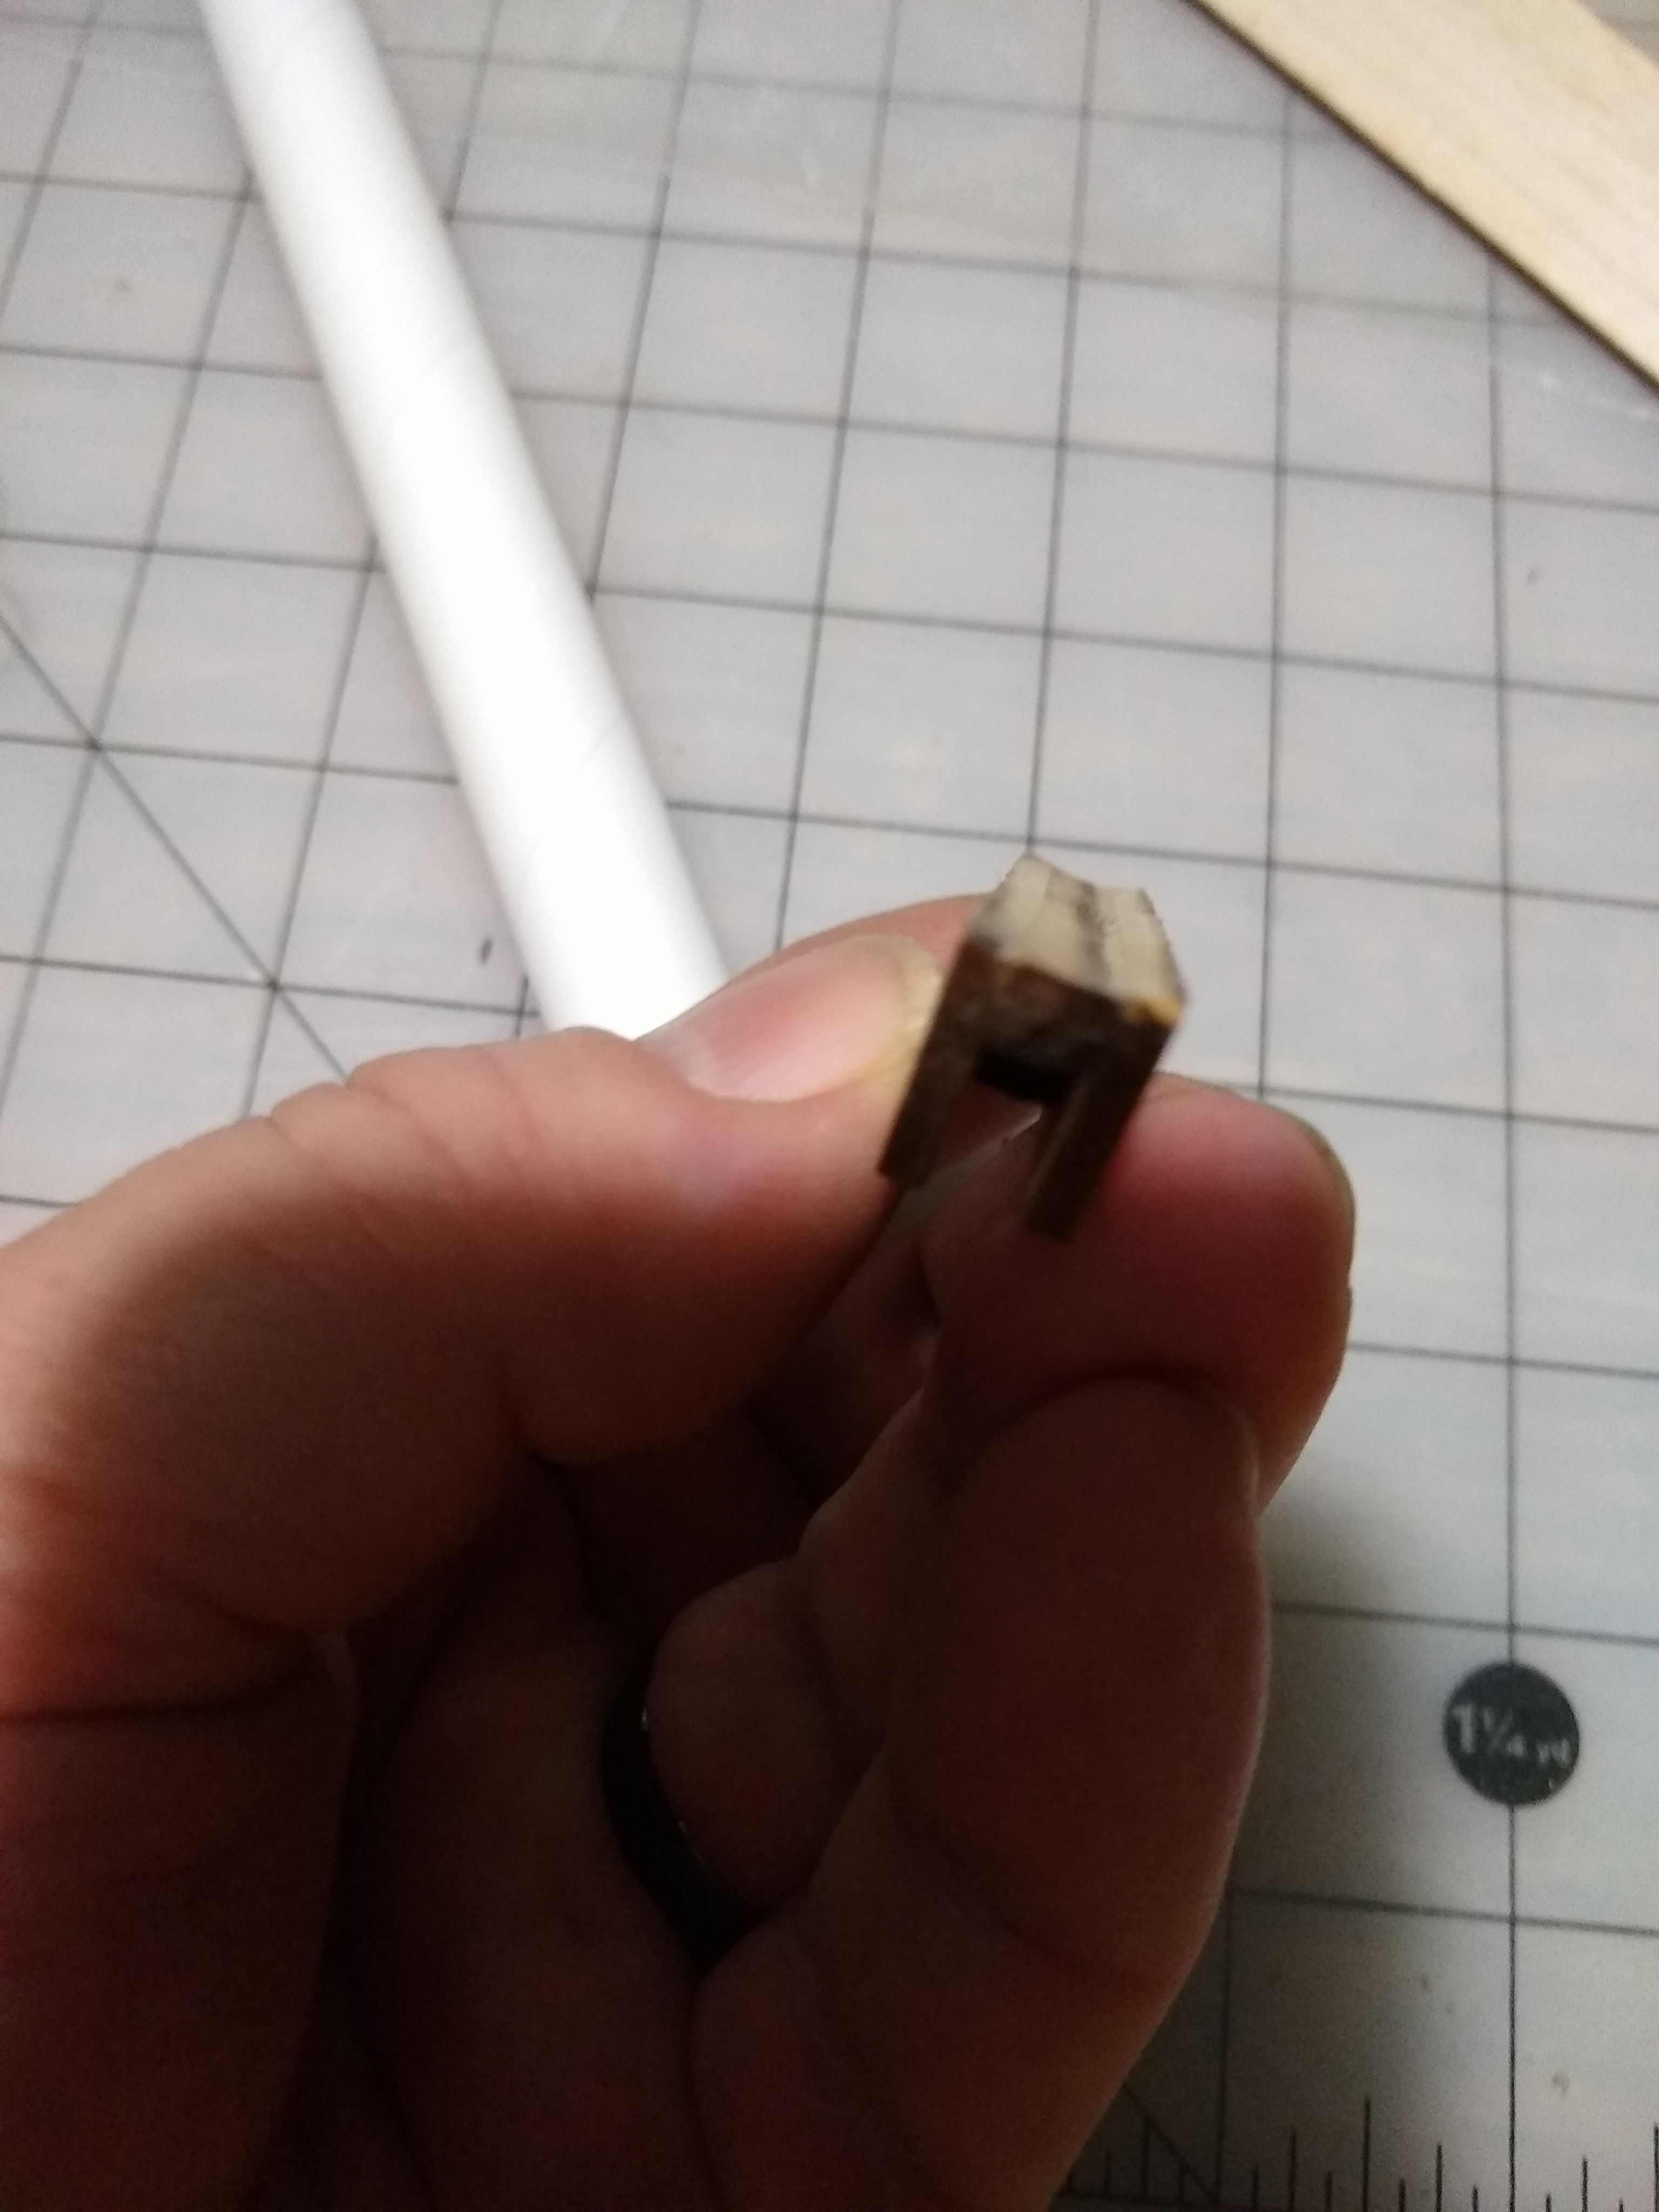
We can move on to the other half of the sky hook, a sandwich of a saw tooth between two covers. The instructions call this the sky pod. Find and separate all three pieces of the pod.... two covers and one saw tooth hook. You will glue the saw tooth between the two covers with wood glue. Note, only apply the glue to the side of the saw tooth hook, without allowing any to ooze out into the teeth. Likewise, you don't want any to ooze out the bottom longest edge to seal the bottom surface. Here's why: You're going to sand away some of that flat, longest edge to form a contour so the sky hook pod will hug the body tube.

You can do both sides of the sky hook at once, watching out for any oozing, and assuring that your bottom longest edge are flat, parallel and aligned. Squeeze the two halves together, forcing the glue to bond to both sides. When finished, your teeth should be hidden and recessed inside the sandwich, and the unit as a whole can stand on their united flat surface. (Those who think ahead will be able to see the benefit of checking this flat surface against the body tube before the glue has grabbed, as a slight mis-match in the flat surface may make sanding less of a chore in the next step. Again, don't allow any glue seepage onto the body tube or as little as possible to squeeze out. You don't want ANY in the teeth, for fear of filling them like a cavity filling, or worse, gluing the teeth together by accident.)

In the meantime, it is time to check on our flat wing structure, and time to adhere the keel and fuselage to it if you haven't already. Therefore, all of these parts must either be dry and firm, or continue waiting (overnight?) for them to cure.

To sand the curvature or contour into the sky hook pod, first find a old spent 18mm motor and carefully insert it almost all the way into one end of the body tube. Leave about 1/4" sticking out so that you can grab and remove it after this step. You may wrap the spent motor with a slight bit of masking tape to improve the grip of the body tube over the motor. (The sole purpose of doing this step is to buck up or reinforce the body tube so that it is not crushed during sanding.)

Now, wrap a small piece of sandpaper around the exterior of the body tube overtop of where the spent motor is supporting it. Holding the paper in place (or tape it down, I don't care) take the cured/dried sky hook pod and sand it long the body tube. Take care to hold the pod squarely at 90 degrees to the body tube. A gentle back and forth motion will soon start to shape that "flat" bottom edge into the contour of the body tube. Stop and check, and if you find you're sanding more to one side than the other, flip ends of the motor pod and sand some more. Within a few minutes, you should have a nice smooth contour running the length of the hood pod unit. You may now remove the sandpaper when finished.
Next step is to mark the body tube. Mark a line 1 3/4" inches up from the end of the body tube. (NOT from the end of the spent motor, if you still have it inserted.) Extend a line another 3 1/2" from that mark running straight and true up toward the front of the body tube. This line you have drawn will be the alignment line for the pod unit you have just sanded. Make a mark on the pod hook side 1/16" forward from the rear of the pod hock unit. You can check which end is the rear by first trying to engage the hook teeth with the fuselage teeth on the top of the glider keel. It only engages one way. If it sticks or is too tight a fit, sand a little off the sides of the fuselage hook and recheck.

Align the dot over the 1 3/4" inch mark when you glue the pod unit onto the body tube. You may want to sand a little along the 3 1/2" line just to rough up the body tube slightly and remove the graphite from the pencil mark. Your wood glue should bite and hold well in any case. DOUBLE CHECK TO ASSURE THE TEETH ARE FACING FORWARD AND WILL ENGAGE THE GLIDER. Make certain the sky hook pod unit is straight and true at 90 degrees from the body tube when curing. Your pod unit should sit comfortably along the body tube, the contour hugging the tube with the dot over the 1 3/4" mark while drying.
You can immediately position the launch lug (straw) along side the pod unit and lay a bead of glue for it to sit in. Be careful not to obstruct either end of the launch lug with glue: It needs free and clear access above and below its openings. Set aside to dry vertically. Recheck to assure the body tube does roll or rotate, allowing these additions to slide off and cure on your table.
We're going to pause here while the glue dries before moving onto the rear motor mount and final assembly.
This has been the Thrifty Rocketeer saying, "Check to make sure that your body tube doesn't roll, or your saw tooth hook pod doesn't fall off before curing."

Comments
Post a Comment